 77,000+ Tools Available Online
 Quality Tools for Every Project
 Fast Shipping on Thousands of Items
 Expert Service & Support
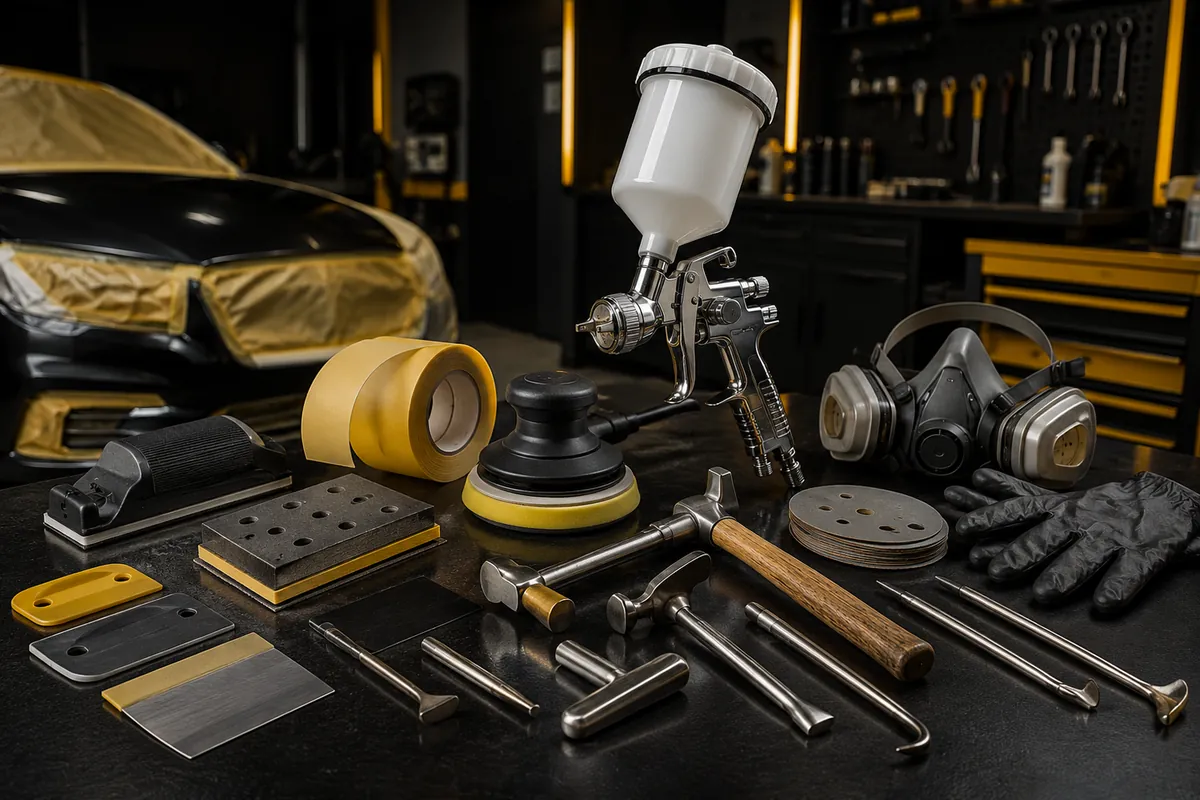
Whether you’re running a full collision center or setting up a dedicated paint booth in your shop, having the right tools for every stage of the refinish process separates clean, professional results from callbacks and rework. Auto body and paint work demands precision at each step — and that precision starts with the equipment. This guide walks through the core tool categories every shop needs, what to look for in each, and why cutting corners on any of them costs you time and money on every job.
Surface Prep and Abrasives
Surface prep is where the job is won or lost. Paint doesn’t hide anything — it magnifies imperfections. Every panel you shoot needs to be mechanically clean, properly abraded, and free of contamination before a drop of product goes down. That means having the right abrasives for every stage.
Sandpaper and Grits
A proper abrasive inventory covers a wide range of grits. Coarse grits (36–80) handle heavy material removal — stripping old paint, knocking down filler high spots, or prepping bare metal. Mid-range grits (120–180) shape body filler and feather edges. As you move into primer stages, you’re working 220–320. Final blocking before color goes down typically runs 400–600, with finish sanding in the 800–1500 range depending on the system and what you’re shooting.
Quality matters here. Cheap sandpaper loads fast, tears early, and doesn’t cut consistently. Brands like Sunmight USA produce professional-grade film and paper discs engineered specifically for automotive refinish, with consistent grit distribution and anti-clogging coatings that make a measurable difference in how long abrasives last and how evenly they cut.
Sanding Blocks and Hand Tools
Flat and radius sanding blocks are non-negotiable for panel work. A bare hand behind a sheet of sandpaper creates pressure points and rounds off edges that should stay sharp. Blocks keep the abrasive flat and distribute pressure evenly. Keep a set that covers hard flats, soft flexible blocks for compound curves, and narrow profile blocks for door jambs and tight transitions.
DA Sanders and Orbital Tools
A quality dual-action (DA) random orbital sander is one of the most-used tools in any body shop. It speeds up filler shaping, primer blocking, and final prep while reducing the risk of swirl marks you’d get from a straight-line sander. Look for variable speed control, a comfortable grip for all-day use, and a quality pad backing plate — a cheap backing plate will wobble and leave uneven cuts. Air-powered DA sanders from brands like Astro Pneumatic are reliable workhorses in production environments.
Stripping Discs and Wire Wheels
When you need to get back to bare metal — around weld areas, at rust-prone edges, or for surface rust prep — stripping discs and flap wheels save hours. Angle-grinder-mounted stripping discs cut through old paint and filler without loading up like sandpaper. Keep assorted wire cup brushes and knotted wire wheels for seam cleaning and rust removal in tight areas.
Dent and Metal Work
Before any filler goes down, the metal needs to be as close to OEM shape as your skills and the damage allow. Filler is a finishing material, not a structural repair material. The more accurately you bring the metal back, the less filler you use, the stronger the repair, and the better it holds up over time.
Body Hammers and Dollies
A solid set of body hammers and dollies is foundational. Hammers come in different face profiles — picking hammers, finishing hammers, and shrinking hammers each serve specific functions. Dollies back the metal from inside the panel as you work from the outside. The combination of hammer weight, face profile, and dolly contour determines how the metal moves. Invest in a set with varied profiles and you’ll be equipped for most panel shapes.
Slide Hammers and Dent Pullers
For panels where you can’t access the back side, slide hammers and dent puller kits are essential. These mount to the damaged area via welded studs, screws, or suction and allow you to pull metal outward. Stud welders pair with slide hammers to give you attachment points anywhere on a panel — even in areas completely blocked from the back. A quality stud welder/puller kit gives you precise control over where and how hard you pull.
Picks and Pry Tools
Long-reach picks, pry bars, and trim removal tools round out your metal work arsenal. Picks let you work small creases from behind door skins and in tight access points. Pry tools with protected tips let you manipulate panels without marring surrounding surfaces or trim pieces.
Body Filler and Application
Polyester body filler is used to level minor low spots, pinholes, and surface irregularities after the metal has been properly straightened. The application tools are simple, but technique and consistency matter.
Spreaders and Applicators
Plastic spreaders in multiple flex ratings — stiff for initial application, flexible for spreading thin coats and feathering edges — are inexpensive but important. Keep a stock of them. A spreader used for mixing will contaminate your filler with old hardener if it isn’t cleaned thoroughly. Many shops treat spreaders as semi-disposable and swap them frequently.
Mixing Boards and Ratio Control
Mixing filler and hardener at the right ratio matters. Too little hardener and the filler stays soft and won’t sand cleanly. Too much and it kicks too fast, develops pinholes, and can shrink unevenly. Use a clean, non-porous mixing board — glass or a glossy mixing pad — and follow the manufacturer’s ratio guidelines. Work quickly and apply before the filler begins to skin over.
Masking and Panel Prep
Masking is more than keeping paint off the glass. Done right, it controls blend edges, protects adjacent panels, keeps overspray out of jambs and seams, and sets up your technician for clean, confident spray work. Done wrong, it creates tape lines, lifted edges, and overspray that takes hours to correct.
Masking Tape and Paper
Use automotive-grade masking tape rated for the temperatures your booth runs. General-purpose masking tape bleeds and lifts under heat. Fine-line tape gives you precise edges for blend lines and two-tone work. Masking paper dispensers with mounted tape applicators speed up the process considerably on production work.
Plastic Sheeting
Pre-cut drop plastic or rolled masking film protects bumpers, adjacent panels, and the entire vehicle from overspray when you’re shooting a single panel or doing spot repairs. Have it on hand in multiple widths.
Prep Solvent and Tack Cloths
A quality wax-and-grease remover applied before every scuff and before every coat is mandatory, not optional. Silicone contamination causes fish-eyes. Wax and oil cause adhesion failure. Products from SEM Products include proven prep solvents and surface cleaners formulated for automotive refinish. Follow up with a tack cloth just before you spray to pick up any remaining dust — not the same thing as a clean wipe, and not something to skip.
Spray Equipment
Your spray gun is the most visible part of the paint process, but it’s also the most misunderstood. A great gun with a bad air supply gives you bad results. A bad gun with a great air supply gives you bad results. Everything in this system works together.
HVLP and LVLP Spray Guns
HVLP (High Volume Low Pressure) guns are the industry standard in most refinish environments — they comply with VOC regulations in most regions and deliver good transfer efficiency, meaning more paint on the panel and less in the air. LVLP (Low Volume Low Pressure) guns require less CFM from your compressor and can be a good option in shops without high-output air systems. Gravity-feed guns are standard for topcoats. Siphon and pressure-feed guns still have their place for high-volume primer work and specialty applications.
Needle, nozzle, and air cap sets are matched to specific material viscosities — what works for primer won’t give you the right atomization for a clear coat. Know your gun’s setup and match it to the product you’re spraying. Clean your gun thoroughly after every use; dried material in the fluid passages is the most common cause of spray pattern problems.
Regulators and Moisture Traps
A quality inline regulator at the gun lets you set and hold precise air pressure regardless of what else is running in the shop. Combine that with a desiccant dryer or moisture trap at the drop line — water in the air line causes blushing, pinholes, and adhesion problems. This is cheap insurance against expensive rework.
Air Supply Basics
Know your compressor’s actual output in CFM at working pressure, not the marketing number on the label. A DA sander, a spray gun, and a blow gun all running simultaneously will tax an undersized system. Plan your air system for peak demand, not average demand. Larger tank capacity smooths pressure fluctuations during continuous spray work.
Refinish and Finishing
The refinish stage — primer, color, and clear — is where the job becomes visible to the customer. The finishing stage is where it becomes perfect. Both require the right tools and the right sequence.
Primers and Sealing
Primer serves multiple functions: it promotes adhesion, provides a uniform color foundation for topcoats, fills minor surface texture, and seals the repair from moisture. Epoxy primers, urethane primers, and high-build primers each serve different purposes in the refinish system. Follow your paint system manufacturer’s guidelines for which primer to use when — these aren’t interchangeable products.
Color and Clear Application
Basecoat/clearcoat is the dominant system in modern refinish work. Basecoat establishes color and effect; clear coat provides gloss, depth, and protection. Both require consistent gun speed, overlap, and distance from the panel. Technique is learned, but consistent equipment — a gun that atomizes correctly, clean lines, stable pressure — gives your technique the best chance to produce good results. Explore the full auto body and paint category to find the spray equipment, abrasives, and prep tools that fit your workflow.
Buffers, Polishers, and Compounds
Even a great spray job benefits from machine polishing to remove any light texture in the clear, blend the edges of a spot repair, or restore gloss on a vehicle that came in with oxidized paint. Rotary polishers cut faster and are effective in trained hands; dual-action polishers are more forgiving and suitable for technicians still developing their machine polish technique. Keep a range of cutting and finishing compounds and foam pad grades to match to what the paint needs.
Brands like 3M have long set the standard in automotive abrasive and finishing compounds, with product lines that cover every stage from aggressive cut to final glaze. Matching compound aggressiveness to clear coat hardness and defect severity is a skill that develops with experience — but having the right compounds available is what makes the skill applicable.
Safety and PPE
Paint booth and body shop environments expose workers to isocyanates in two-part urethane products, solvents, particulates from sanding and grinding, and noise. These aren’t minor hazards. Isocyanate sensitization is permanent — once sensitized, a technician may not be able to work in a spray environment again. The right safety and PPE is not optional equipment.
Respiratory Protection
A supplied-air respirator (SAR) is required when spraying isocyanate-based products — two-stage urethane primers, two-part clear coats, and similar systems. Air-purifying respirators with organic vapor cartridges are appropriate for solvent-based products and sanding operations but do not protect against isocyanates. Know which products you’re spraying and match your respiratory protection to the hazard, not just to what’s convenient. Check cartridge replacement intervals and stick to them.
Eye and Face Protection
Safety glasses or goggles are required any time you’re grinding, cutting, or working with chemicals. A full face shield protects against splash hazards during chemical mixing and is smart practice any time you’re spraying. Don’t rely on a spray gun’s natural downward direction to keep product out of your eyes — overspray travels.
Gloves and Chemical-Resistant Protection
Nitrile gloves are the standard for most shop chemical contact — solvents, hardeners, and paint products. Thicker chemical-resistant gloves are appropriate for handling concentrated strippers and acids. Change gloves frequently; a glove compromised by a pinhole or small tear is worse than no glove because it traps solvent against the skin.
Protective Suits and Coveralls
Disposable paint suits keep overspray off your skin and clothing and reduce the amount of fiber and lint you carry into the booth environment. In high-production shops, having a clean suit for the booth is standard practice — not just for technician protection, but because clothing contamination is a source of fish-eyes and paint defects.
Build Your Shop’s Toolkit the Right Way
The shops that do consistent, high-quality refinish work didn’t get there by luck. They built their tool inventory deliberately — choosing quality equipment at each stage, maintaining it properly, and replacing worn abrasives and consumables before they start affecting results. Whether you’re equipping a new collision department or upgrading what’s already on the floor, start with the categories where you feel the most friction in your current workflow.
Browse the complete selection at Our Tool Crib to find professional-grade body and paint equipment from the brands working technicians rely on. From surface prep through final polish, the right tools are here.
Shop Quality Tools for Every Project
77,000+ tools from the brands pros trust. One trusted source.
Shop All Tools